
In the beauty world, there’s applying eyeliner, which is a 101 class. Lining your eyes with liquid liner is a 200 class, and mastering the cat eye is a 300 class. And then there’s tightlining, the so-called “invisible eyeliner,” which is a 400 class. Below, our 400 class on invisible eyeliner in GIFs.
Instructing the class is the Wall Group’s Beau Nelson, who has tightlined Kristen Stewart, Natalie Portman, and Hayden Panettiere for the red carpet. “If you do tightlining right, it shouldn’t look like you are wearing any eyeliner at all,” he explains. Our student-model is PR girl Christy Meisner, who once told me she wanted to start a blog about lipstick and French fries, a journalistic endeavor I fully support.
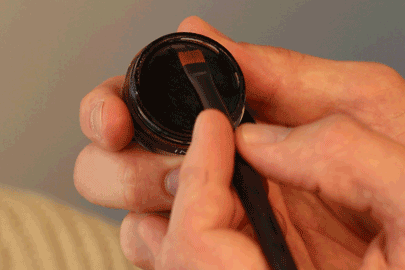
Step One: You will need a flat liner brush. Nelson uses Laura Mercier’s Flat Eye Liner brush, which has a soft, yet supportive, small swath of bristles at the end. You’ll want to make sure that the ends have a little give, but not too much, so that you can evenly control how much pigment is deposited. Nelson likes using Inglot AMC Eyeliner in 77, a gel-based eyeliner that he describes as “five times blacker than any other black.” If your eyeliner tends to blur or smudge, or you have oily eyelids, you would also apply Urban Decay Primer Potion all over the entire lid, up to the roots of your lashes, to lock your eyeliner look in place.
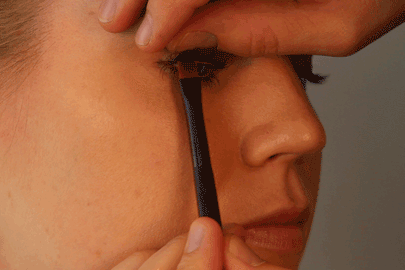
Step Two: The press-and-wiggle is the bend-and-snap of tightlining. Key to mastering tightlining is pulling up your eyelid slightly and then depositing pigment not above or below your lashes, but straight on them, so that you fill the “gaps” left by the growth of your individual eyelashes. Press the pigment into your lashes, and then gently wiggle the brush back and forth to soften the line and spread the liner. Repeat this from the inner to the outer corner of your eye; “anywhere you have lashes,” Nelson explains. If you are doing this at home, position a mirror so that you are looking down at it, while slightly pulling your eye upward. Nelson makes it look easy.

Step Three: Curl your eyelashes, starting from the base and moving slowly toward the tip in tiny increments. Nelson uses the Shu Uemura eyelash curler.
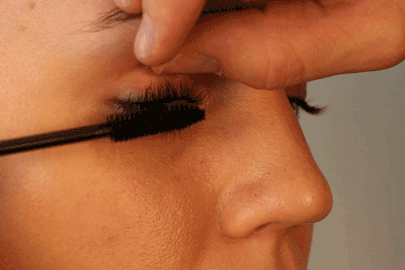
Step Four: Apply mascara. Nelson, who is “obsessed with eyelashes,” scoffed when I asked whether there was a more finessed method than simply painting each lash. His preferred application method resembles the press-and-wiggle. He focuses the mascara wand at the root of the eyelashes and wiggles to add volume and depth. He concentrates more pigment at the root, rather than the tip of the lashes (the opposite of just the tip), so that the lashes look fluffy and separated, rather than clumpy and dense.
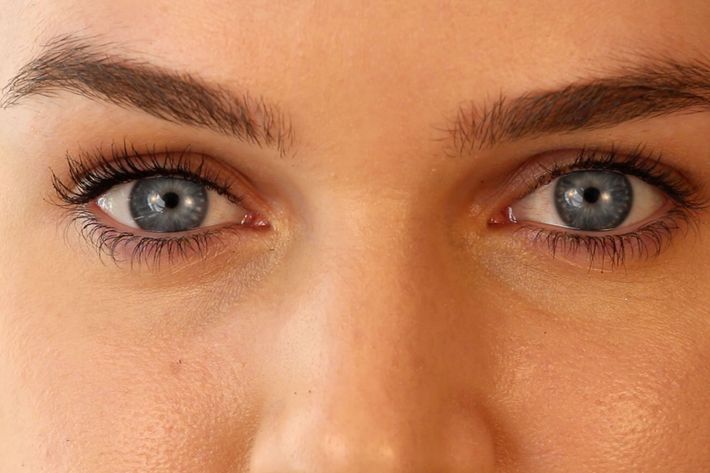
Step Five: The finished look. Now go forth — press-and-wiggle.