
Dolce & Gabbana’s spring 2014 hair look was the stuff that romantic Italian dreams are made of. The loose bun, threaded through with a floral chain, is exactly the type of hairdo you would want if you decided to embrace your pasta-eating destiny or needed the perfect look for an outdoor fall wedding filled with seasonal blooms. Christy Meisner, creator of Crowns by Christy, is on hand to show us how to create a homemade floral chain (not to be confused with the all-too-ubiquitous music-festival flower crown). Here’s how.
Step 1: You’ll need some supplies to create a floral chain, all of which can be found at your local supply store. First, two lengths of long ribbon (these serve as ties), pruning or garden shears, scissors, and two types of florist wire, green and brown. And flowers — in this case, Meisner uses several small bunches of in-season flowers and decorative shrubbery (like baby’s breath). Since the Dolce & Gabbana chain has flat blooms, she chose bunches of similar volume. Select a length of brown florist wire (about a foot) to serve as the base for your chain. Cut several six-inch pieces of green wire (sometimes, these are pre-cut, which also works). You’ll use these to wrap about the base. Compose your chosen blooms into bunches, and clip one long piece as the “starter” piece.
Step 2: Place your starter piece following the length of your brown wire and wrap the green florist wire around the base. You’ll want to wrap at the bottom of the bloom, as you will keep adding blooms here.
Step 3: Leave the top end of the starter piece untethered by wire (for now). Here’s another look at how you wrap, either by twisting or wrapping the length of the wire over the bloom. Wrap the entire length of green over the base of the bloom until it is used up. If you are using a green wire from a roll, you can trim the ends.
Step 4: It’s important to designate one side of the wire as the front, by continuing to add blooms to the same side of the wire. Clip another set of blooms. If the chosen blooms grow in shorter bunches, you can clip a small cluster as seen here. Place the new bloom directly underneath the previous one. Don’t be afraid of placing the next bloom too close to the previous; closely clustered flowers look better and make the chain look more lush.
Step 5: Repeat the wrapping technique along the length of the chain with all of your flowers. There’s no particular order you have to use for the flowers; you can repeat the same combination or make it more ad hoc.
Step 6: You will want to wrap flowers until the very end of the length of base wire. At the end, create a loop using the base wire. Secure the loop by wrapping green florist wire at the base of the loop.

Step 7: Take your ribbon, double it at the halfway mark, and pull the folded end through the loop.
Step 8: Take the ends of the ribbon and pull it through the ribbon end to create a ribbon tie. Repeat steps 5 through 8 for the other end.
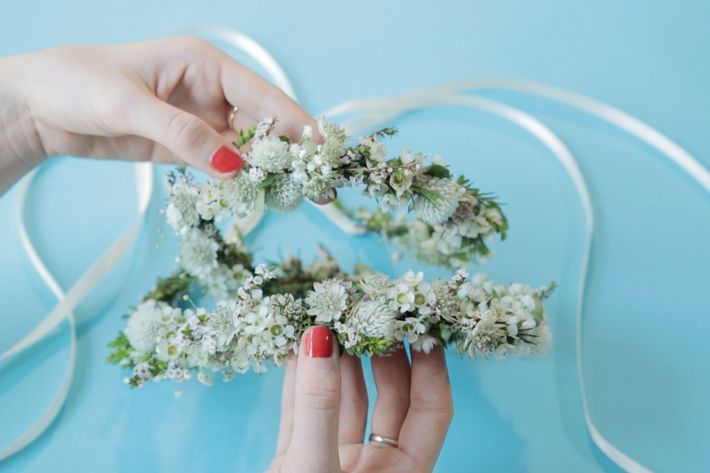
Step 9: The finished result.