My New Favorite 3-D Printer Is Ideal for Beginners and Experts Alike
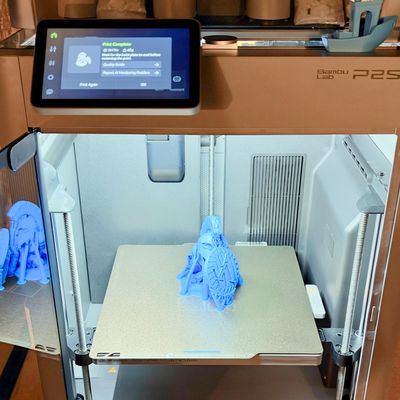
I’ve been experimenting with and using 3-D printers for over a decade now, but it always felt like work. It wasn’t until I bought and started using the Bambu Lab P2S that I actually started having fun with the hobby.
Prior to that, I’d owned Prusa and Creality printers that felt like more work than it was worth — it took so much time and effort to get good results that I wanted to quit. In fact, I flat out gave up on my Creality Ender 3 Pro and donated it to my local Goodwill.
The Bambu P2S’s ease of setup and use along with its reliable performance and print quality — something I can vouch for after putting several hundred hours of print time on it — combined with its affordable price are why it’s currently our top pick as the best 3-D printer overall.
You can get the P2S on its own, or for a couple of hundred bucks more you can pick up the the $649 Combo kit, which includes the AMS 2 Pro multi-material system. The AMS 2 Pro lets you load four spools of filament in different colors or materials and switch automatically between them, opening up the world of multicolored printing to everybody.
New! You can now save this product for later.
New! You can now save this product for later.
Setup and first print
The P2S Combo arrives in a single box with the included AMS 2 Pro tucked securely inside the printer. Unboxing, setting it up, and running through the initial calibration process takes about an hour from start to finish.
Inside the box is a toolkit along with a getting-started guide that walks you through the process; if you prefer, you can also follow along online using Bambu’s P2S unboxing guide, complete with videos of each step.
You don’t need to be very technical to set it up. You’ll need to remove a few screws with the included tools, cut some zip ties, remove some foam inserts, connect some tubing and wires between the printer and AMS 2 Pro, and install the optional external spool holder.
After powering on the P2S for the first time, the five-inch display walks you through connecting the printer to your Wi-Fi, then binding it to your Bambu Lab account. Finally, you’re prompted to go through the initial calibration process, which takes about 40 minutes to complete.
Once that’s done, you can start printing right away. There are models already loaded in the printer’s storage that you can select from. It’s tradition that your first print on a new printer is the Benchy model, so that’s exactly what I did, selecting it from the printer’s file menu. Thirty minutes later, I had a successful print.
The P2S measures 15.4-by-16-by-18.8 inches and weighs just under 33 pounds. You’ll want to place it somewhere that’s stable, and preferably you won’t want to have to move it around a lot (if you do, make sure to go through the calibration process each time you move it).
A jack-of-all-trades
The P2S is a CoreXY printer, meaning that the build plate (which holds the model you’re printing) moves up and down for each new layer on the Z-axis, while the toolhead (which dispenses the material) moves around the print bed on the X- and Y-axes.
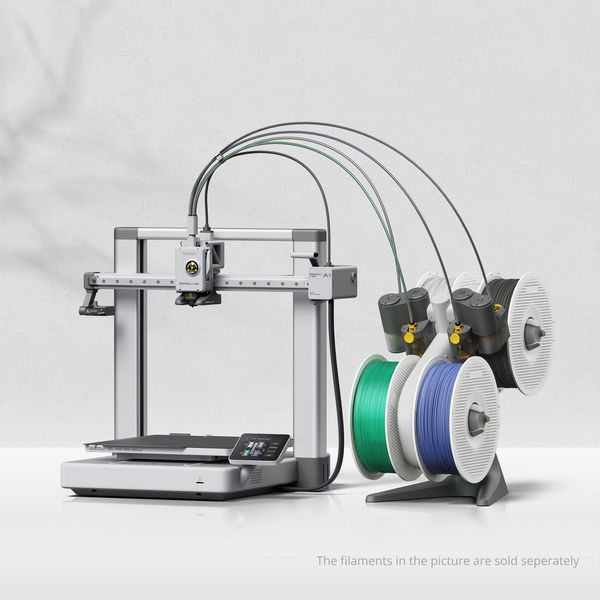
That’s in contrast to the bed slinger design used in printers such as Bambu Lab’s A-series, which moves the build plate back and forth on the Y-axis, while the toolhead moves left to right and up and down on the X- and Z-axes, respectively.
While bed slingers tend to be cheaper, a CoreXY printer is more accurate and faster and often has an enclosed housing that prevents temperature swings that affect print quality.
The P2S has a single toolhead and comes fitted with a 0.4-mm “hotend,” or nozzle. That’s the nozzle size I use for nearly all of my prints (and most users stick with the stock nozzle). However, you can swap out the nozzle in under 30 seconds without any tools. You can go smaller with a 0.2-mm nozzle for finer prints, such as earrings or small figurines, or go bigger with a 0.6-mm nozzle for larger models and tools.The build plate in the P2S measures 256-by-256 mm, which has been big enough to print anything I want.
There’s a 1080p camera in the front-left corner of the housing that’s used to monitor for failed prints, livestream a print, or record a time-lapse video of a print to the printers internal storage. You can use a thumb drive to expand the printer’s 8GB of built-in storage, which is quickly taken up by print files and videos.
As for materials you can use with the P2S, well, the list is long. Staple filaments like PLA and PETG are supported, as are softer materials like TPU (ever seen the airless basketball? That’s printed with TPU), or more rugged materials such as ABS that’s often used when printing stuff you need to be sturdy, like shelves or tools.
The lone feature that would be a nice to have on the P2S is a heated chamber, which can aid in printing some materials, such as ABS. That’s a feature reserved for Bambu’s higher-end (and more expensive) printers, like the X2D. I’ve only missed having it a handful of times, and it isn’t at all necessary if you’re printing with PLA and PETG (which is more likely what you’ll be using). The enclosed print chamber alone is more than enough.
Going multicolored
My favorite feature of the P2S — and it’s not even close — is its ability to print in multiple colors. I’ll never forget the first time I used the P2S for a multicolored print and how amazed I was. Not only did the final print look fantastic, but I just couldn’t get over how easy it was. I’d previously tried multiple color prints on a Prusa Mini+, but it was entirely manual and required babysitting the print to swap colors at different layers.
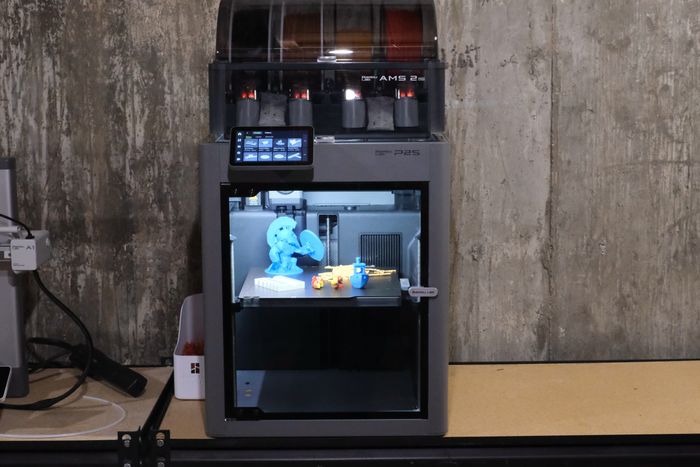
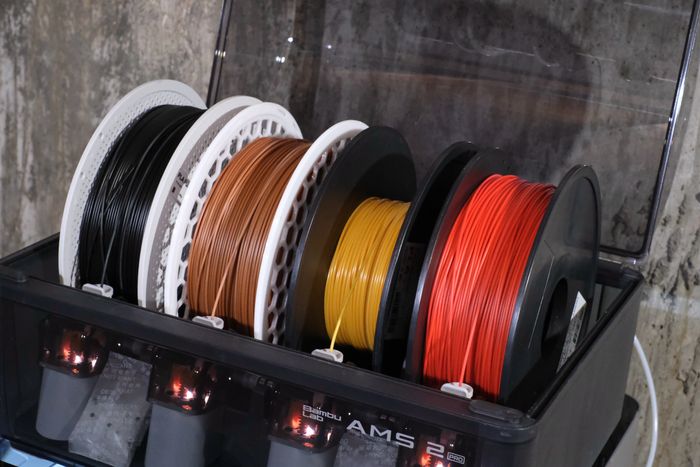
As mentioned above, the P2S Combo includes the AMS 2 Pro, the attachment that allows you to use multiple colors in the same print. The AMS 2 Pro enclosure sits on top of the printer, where it connects via a short cable and single PTFE tube. There are four slots inside, each one for a different spool of filament. That means you can put up to four different colors in the AMS and it’ll handle the filament changes during a print, swapping out one color for another each time it’s needed.
You can connect up to 4 AMS 2 Pros to the P2S, giving you the ability to print with up to 16 colors at a time — insane!
The downside to the P2S having a single nozzle is the amount of waste created with every multicolored print. Each time the printer needs to change filaments, it has to clear the nozzle of the previous color by extruding excess filament of the new color to ensure it’s clear. The end result is a pile of wasted filament, or, as it’s commonly referred to in the 3-D-printing community, “poop.” Clearing the nozzle also adds to the overall print time because each filament swap takes several minutes.
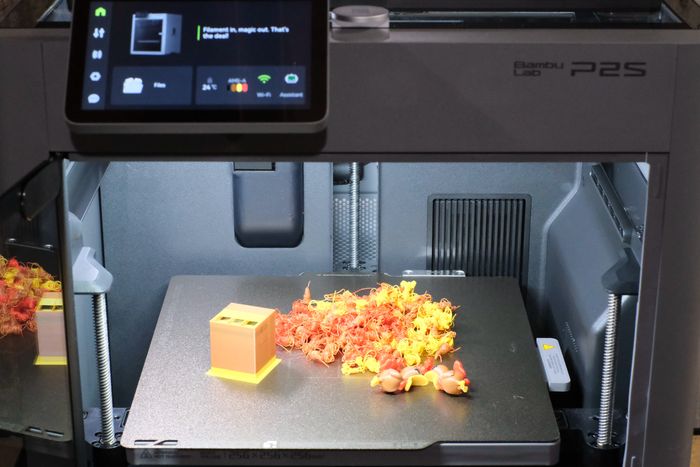
Higher-end printers with multiple print tools, such as Bambu Lab’s X2D, H2-series, or the just-released H3C, speed up the print time and create less waste, but they’re pricey. The H3C starts at $2,500, for instance.
Bambu Lab’s secret sauce
3-D printing can be an intimidating hobby for newcomers. There’s a bunch of jargon that can make you feel like you need to learn a completely different language, and that doesn’t even take into account finding stuff you want to print.
Bambu Lab has done a lot to remove that friction via its software. For example, the Bambu Handy mobile app isn’t used to just monitor prints — you can browse the entire MakerWorld catalogue of models and projects, then send anything you like straight to the printer, all without ever having to worry about print settings. Better yet, you can do it from anywhere you have an internet connection.
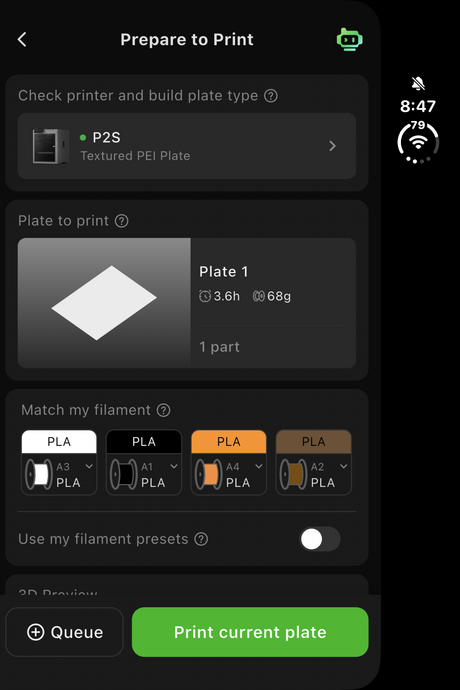
While sitting at my desk writing this review, I browsed holiday-themed models, found one I liked, and started the print — all with three taps without ever leaving my desk and never having to worry about any settings at all. (Granted, I already had the proper colors loaded in the AMS 2 Pro, so that saved me a step.)
Find a model, press print: It could not get easier.
Of course, if you want to go deeper down the 3-D printing rabbit hole, you certainly can use the Bambu Studio app on your computer. Within Studio you can fine-tune print settings such as layer height, infill amount and type, and access other more technical settings.
But the secret sauce is the simple fact that you don’t ever have to do that — you’d be perfectly fine never opening Studio and doing everything from your phone.
Perfect for beginners and enthusiasts alike
The P2S has powered through hundreds of hours of my personal printing, and I’ve had virtually no issues (at least that weren’t self-caused). It’s been a huge change from my prior experiences with 3-D printers, and I’d recommend the P2S as a great option for beginners who want a printer to grow into while also checking all the boxes for anyone who’s been 3-D printing for a while and would appreciate an upgrade from an older, more finicky machine.
More 3-D Printers
More From The Strategist
- The Best Advent Calendars This Year (So Far)
- The Best Things Strategist Editors Have Bought This Year (So Far)
- Hark, the Advent Calendars Arrived (Very) Early This Year
- 63 Things You Should Never Buy Full Price
The Strategist is designed to surface useful, expert recommendations for things to buy across the vast e-commerce landscape. Every product is independently selected by our team of editors, whom you can read about here. We update links when possible, but note that deals can expire and all prices are subject to change.